Search This Blog

Showing posts with label 7-Segment Display. Show all posts

Friday, September 30, 2022

Making A DIY SN74HC595 Serial 10-Digit 7-Segment Display Board

Shift Registers are very useful for expanding the controller I/O ports. However driving a dot matrix display, or multiple seven-segment display also need this kind of chip. Because only multiplexing could not achieve a good displaying task.

Making A DIY SN74HC595 Serial 10-Digit 7-Segment Display Board
Eight-Digit and Ten-Digit Serial Seven-Segment Display Using SN74HC595N

It's not important to make any DIY display like this. But I have many common-cathode type seven-segments display, SN74HC595N shift registers, copper clad board, etc. So I want to use them all rather than keep them new in my own repair shop.

The design was complicated due to multiple count of connection between register to register, and register to display. So I tried to eliminate some components especially the current cutting resistors.

The shift register chip output pin voltage is +5V while the display need around 2V to operate. Without using dozens of current cutting resistors, I reduce the voltage by making voltage division. I add 3 rectifier diodes in series with each common cathodes of the display to divide the voltage.

Eight-Digit Seven-Segment Display

For the first time I design, I was unwilling to do this task due to difficulty in PCB fabrication, and laser printing toner problem. Because the ink cartridge was old. So I only made an 8-digit display.

Making A DIY SN74HC595 Serial 10-Digit 7-Segment Display Board
Arduino Test Program

 I use Proteus 8.10 to design the schematic and PCB.

Making A DIY SN74HC595 Serial 10-Digit 7-Segment Display Board
Schematic Design
PCB contains a lot of wire connections due to a large amount of registers an displays. It seems to be a double side PCB, but I use jumper wire instead.
 

Making A DIY SN74HC595 Serial 10-Digit 7-Segment Display Board

PCB View In Proteus

I previewed this design in 3D viewer. Most of components are lack of 3D packages.

Making A DIY SN74HC595 Serial 10-Digit 7-Segment Display Board
Design 3D View
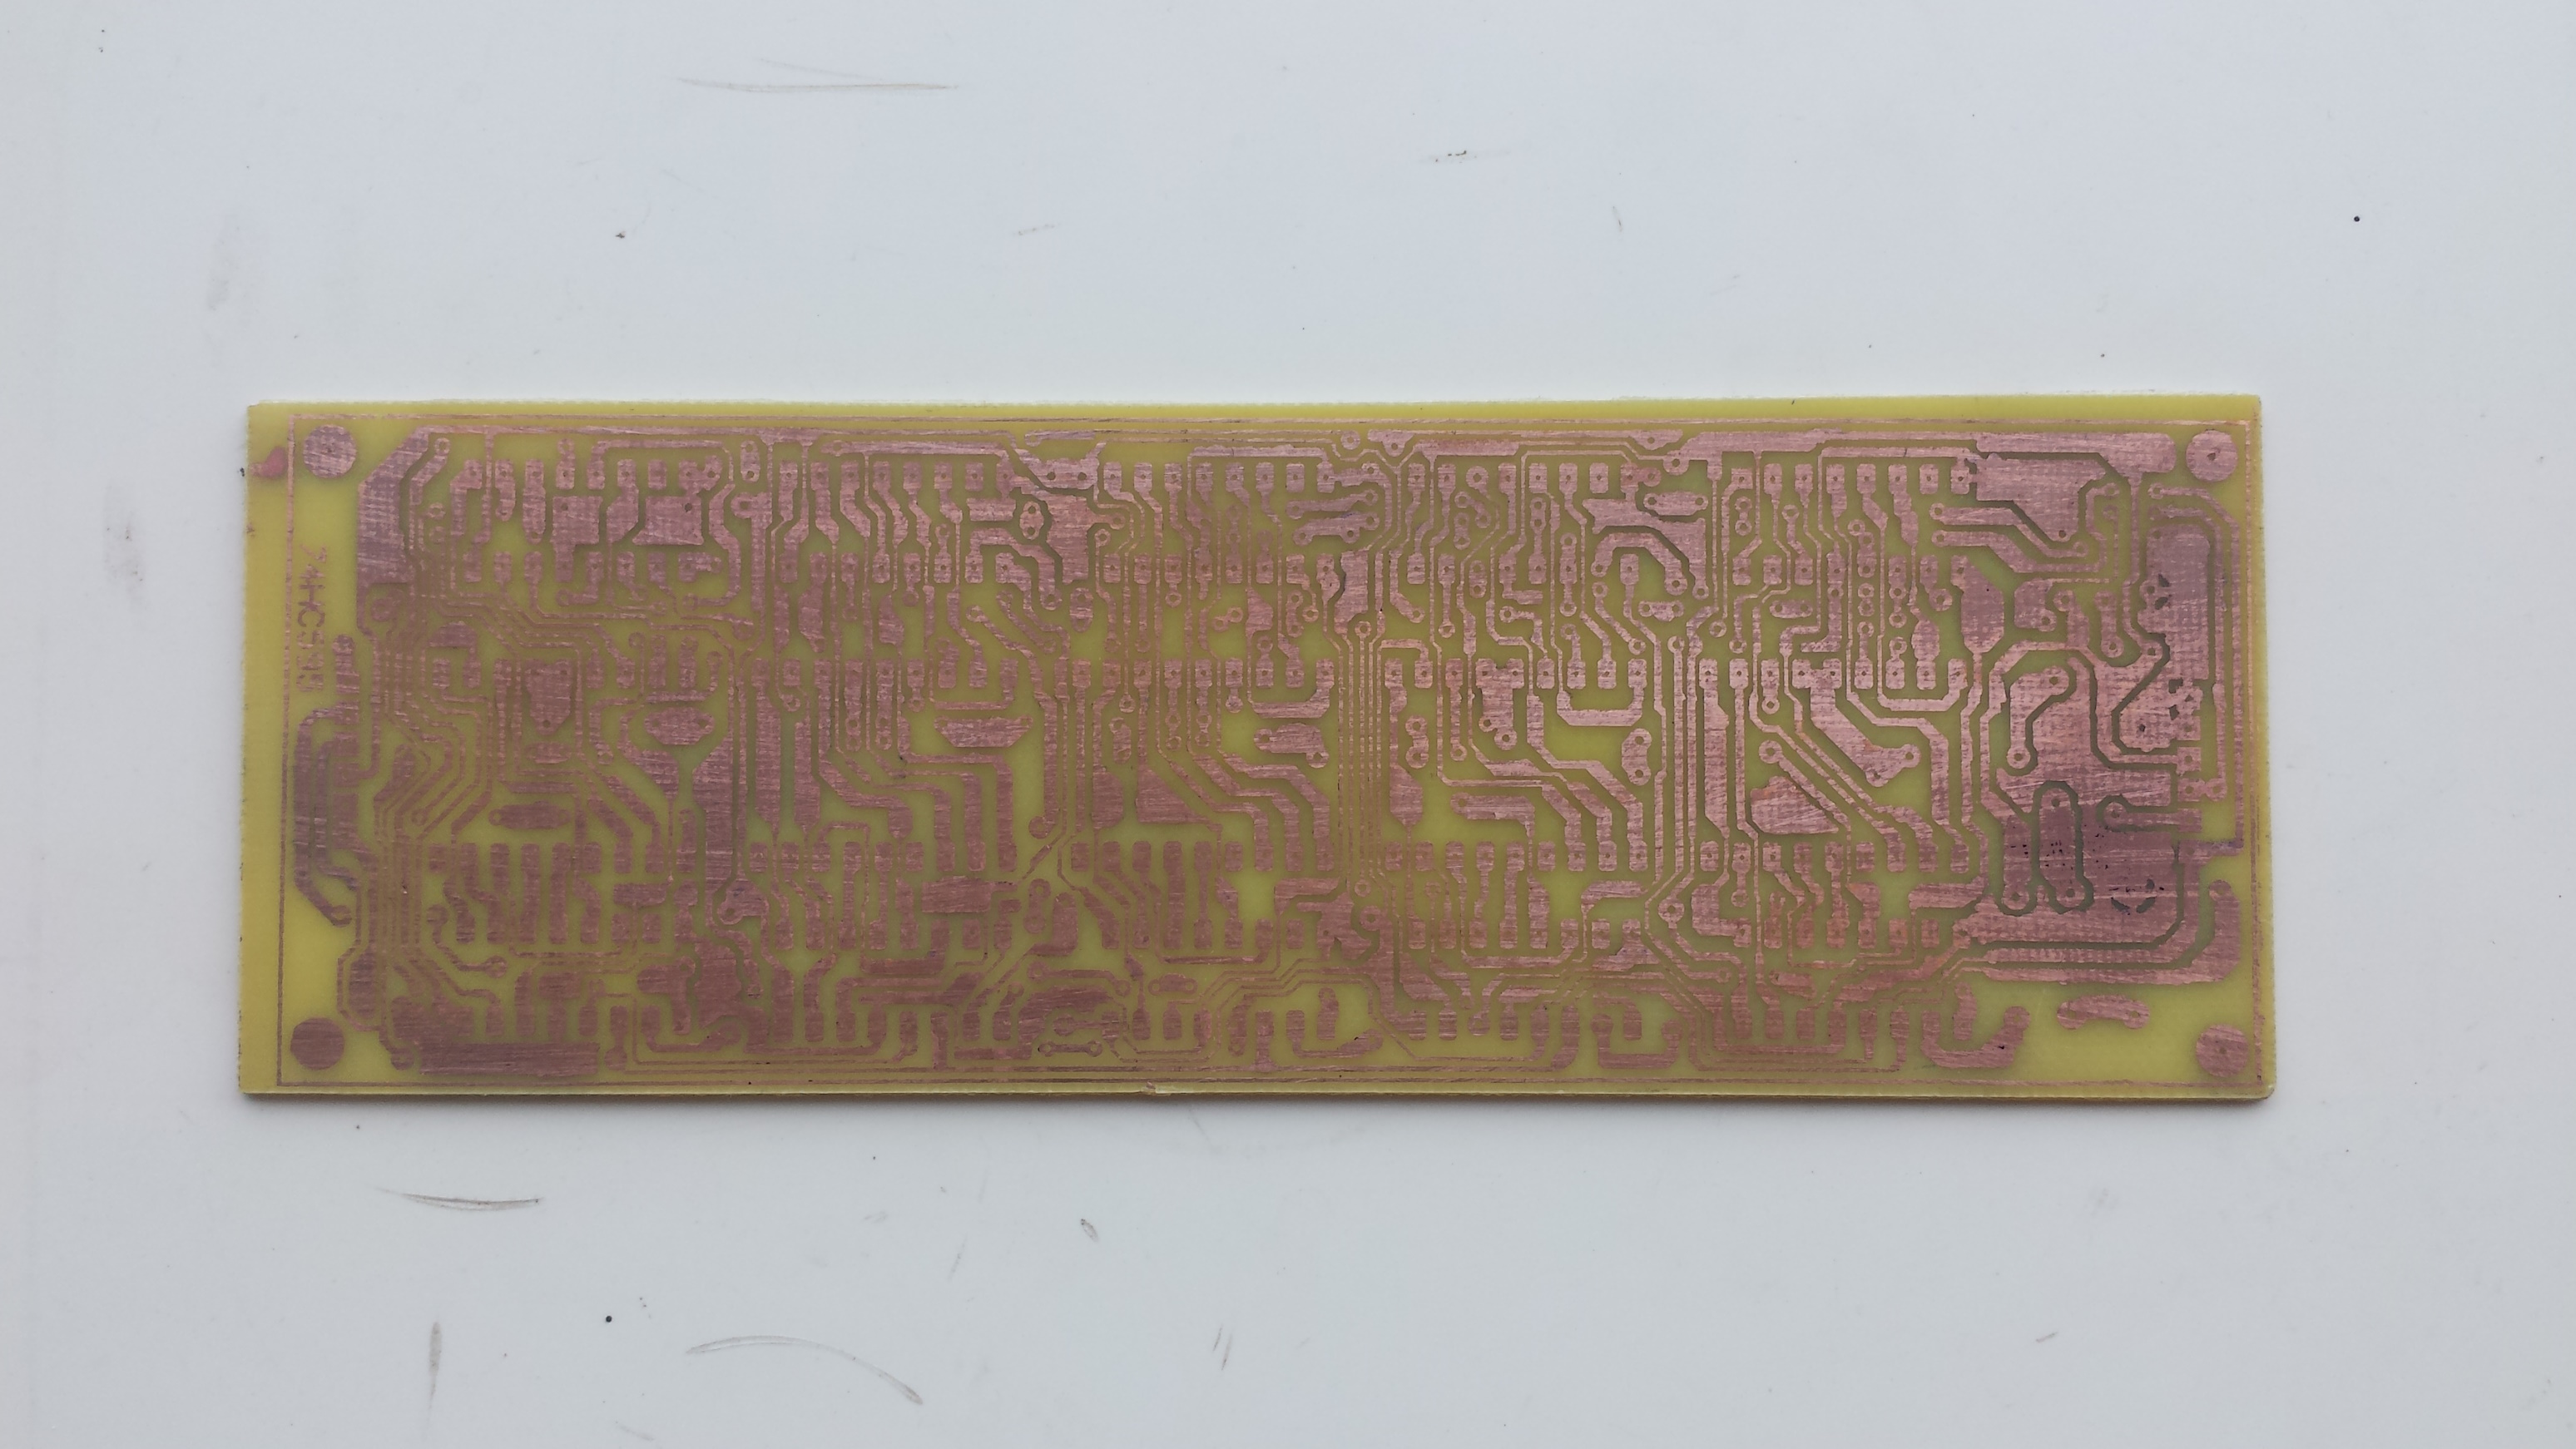
I use toner transfer method to make this DIY PCB. Using sing any online PCB order cost around 10 US Dollars excluding shipping cost. However it is not necessary here.


Making A DIY SN74HC595 Serial 10-Digit 7-Segment Display Board
Component Side Label Transferring

Making A DIY SN74HC595 Serial 10-Digit 7-Segment Display Board
Copper Side After Etching

Making A DIY SN74HC595 Serial 10-Digit 7-Segment Display Board
Copper Side After Soldering

Making A DIY SN74HC595 Serial 10-Digit 7-Segment Display Board
Copper Side Before Etching
I spent one day to finish this DIY electronic hobby project.


Making A DIY SN74HC595 Serial 10-Digit 7-Segment Display Board
Finished PCBA Assembling

It works well but the display doesn't have Dot Point.

Making A DIY SN74HC595 Serial 10-Digit 7-Segment Display Board
I firstly test this PCBA With Arduino Program Due To Ease Of Use.

I store this design file in Github.

Arduino Test Program #1 Using SPI

#include <SPI.h>
 
 
void setup() {
  // put your setup code here, to run once:
  SPI.begin();
  pinMode(10,OUTPUT);
 
 
}
 
void loop() {
  // put your main code here, to run repeatedly:
 digitalWrite(10,LOW);
  SPI.transfer(0x3F);
  SPI.transfer(0x06);
  SPI.transfer(0x5B);
  SPI.transfer(0x4F);
  SPI.transfer(0x6D);
  SPI.transfer(0x7D);
  SPI.transfer(0x07);
  SPI.transfer(0x7F);
  digitalWrite(10,HIGH);
  delay(3000);
}

Arduino Test Program #2


#include <SPI.h>
 
unsigned char ssd[16]={0x3F,0x06,0x5B,0x4F,0x66,0x6D,0x7D,0x07,0x7F,0x6F,
                      0x77,0x7C,0x39,0x5E,0x79,0x71};
 
unsigned char msg1[10]={0x08,0x08,0x76,0x79,0x38,0x38,0x5C,0x08,0x08,0x08};
void setup() {
  // put your setup code here, to run once:
  SPI.begin();
  pinMode(10,OUTPUT);
}
 
void loop() {
  // put your main code here, to run repeatedly:
  /*
 digitalWrite(10,LOW);
 
  for(int i=9;i>=0;i--)
    SPI.transfer(ssd[i]);
  digitalWrite(10,HIGH); 
  delay(5000);
 
  digitalWrite(10,LOW);
 
  for(int i=15;i>=10;i--)
    SPI.transfer(ssd[i]);
  digitalWrite(10,HIGH); 
  delay(5000);
  */

   for(int i=9;i>=0;i--){
   digitalWrite(10,LOW);
 
  SPI.transfer(msg1[i]);
  delay(1000);
  digitalWrite(10,HIGH); 
   }
}

Eight-Digit Seven-Segment Display

I add two more digits to previous design. The PCB design is  quit bigger.

Making A DIY SN74HC595 Serial 10-Digit 7-Segment Display Board

Making A DIY SN74HC595 Serial 10-Digit 7-Segment Display Board

Making A DIY SN74HC595 Serial 10-Digit 7-Segment Display Board

Making A DIY SN74HC595 Serial 10-Digit 7-Segment Display Board

Making A DIY SN74HC595 Serial 10-Digit 7-Segment Display Board

Making A DIY SN74HC595 Serial 10-Digit 7-Segment Display Board

Making A DIY SN74HC595 Serial 10-Digit 7-Segment Display Board

Making A DIY SN74HC595 Serial 10-Digit 7-Segment Display Board

Making A DIY SN74HC595 Serial 10-Digit 7-Segment Display Board

Making A DIY SN74HC595 Serial 10-Digit 7-Segment Display Board

Making A DIY SN74HC595 Serial 10-Digit 7-Segment Display Board

Making A DIY SN74HC595 Serial 10-Digit 7-Segment Display Board

Making A DIY SN74HC595 Serial 10-Digit 7-Segment Display Board

Making A DIY SN74HC595 Serial 10-Digit 7-Segment Display Board


Making A DIY SN74HC595 Serial 10-Digit 7-Segment Display Board
Arduino Test Program

 Arduino Test Program for this PCBA

or #include <SPI.h>
 
unsigned char ssd[16]={0x3F,0x06,0x5B,0x4F,0x66,0x6D,0x7D,0x07,0x7F,0x6F,
                      0x77,0x7C,0x39,0x5E,0x79,0x71};
void setup() {
  // put your setup code here, to run once:
  SPI.begin();
  pinMode(10,OUTPUT);
 
 
}
 
void loop() {
  // put your main code here, to run repeatedly:
 digitalWrite(10,LOW);
 /*
  SPI.transfer(ssd[0]);
  SPI.transfer(ssd[1]);
 
  SPI.transfer(ssd[2]);
  SPI.transfer(ssd[3]);
 
  SPI.transfer(ssd[4]);
  SPI.transfer(ssd[5]);
 
  SPI.transfer(ssd[6]);
  SPI.transfer(ssd[7]);
 
  SPI.transfer(ssd[8]);
  SPI.transfer(ssd[9]);
  */

  for(int i=9;i>=0;i--)
    SPI.transfer(ssd[i]);
  digitalWrite(10,HIGH); 
  delay(5000);
 
  digitalWrite(10,LOW);
 
  for(int i=15;i>=10;i--)
    SPI.transfer(ssd[i]);
  digitalWrite(10,HIGH); 
  delay(5000);
}

Click here to download load this PCBA design file. 


Tuesday, September 8, 2020

STM32F103R6 Two-Digit 7-Segments Display Using SN74HC595N Shift Registers

In this programming example, I will use the high speed SPI module of the STM32F103R6 to interface with shift registers chips. The Serial Peripheral Interface (SPI) is a microprocessor high speed communication protocol using three wires. It has at least serial clock, serial data, and latch pins. It's asynchronous type. This communication protocol commonly used with shift registers chip, serial Flash memory chip, serial SRAM, serial EEPROM, etc.

STM32F103R6 Two-Digit 7-Segments Display Using SN74HC595N Shift Registers
Simulating Program

A serial-in-parallel-out shift registers is popular for expanding the number of digital output pins. We can find two popular types - the SN74HC164 and the SN74HC595N. These chips can be use to drive LEDs, 7-Segment display, dot matrix display, etc.

STM32F103R6 Two-Digit 7-Segments Display Using SN74HC595N Shift Registers
The SN74HC595N In DIP Package

STM32F103R6 Two-Digit 7-Segments Display Using SN74HC595N Shift Registers
The SN74HC595N Pins Diagram


For a single register we use an 8-bit transfer mode. However if we use more than one register as it's shown in this programming tutorial, we can also use the 8-bit transfer mode. But for convenience we must use the 16-bit transfer mode. The hardware NSS signal is activated once for 16-bit transfer mode. However we can use software latch pin instead.

STM32F103R6 Two-Digit 7-Segments Display Using SN74HC595N Shift Registers
Device Configuration Tool

A Push button connects to PC0. Whenever it's press, the counter value will increase. It will roll down to 0 when it reaches 100. The 7-Segment display is common cathode type.

  1. /* USER CODE BEGIN Header */
  2. /**
  3.   ******************************************************************************
  4.   * @file : main.c
  5.   * @brief : Main program body
  6.   ******************************************************************************
  7.   * @attention
  8.   *
  9.   * <h2><center>&copy; Copyright (c) 2022 STMicroelectronics.
  10.   * All rights reserved.</center></h2>
  11.   *
  12.   * This software component is licensed by ST under BSD 3-Clause license,
  13.   * the "License"; You may not use this file except in compliance with the
  14.   * License. You may obtain a copy of the License at:
  15.   * opensource.org/licenses/BSD-3-Clause
  16.   *
  17.   ******************************************************************************
  18.   */
  19. /* USER CODE END Header */
  20. /* Includes ------------------------------------------------------------------*/
  21. #include "main.h"
  22.  
  23. /* Private variables ---------------------------------------------------------*/
  24. SPI_HandleTypeDef hspi1;
  25.  
  26. /* Private function prototypes -----------------------------------------------*/
  27. void SystemClock_Config(void);
  28. static void MX_GPIO_Init(void);
  29. static void MX_SPI1_Init(void);
  30.  
  31. /**
  32.   * @brief The application entry point.
  33.   * @retval int
  34.   */
  35.  
  36. #define SW_Press (HAL_GPIO_ReadPin(SW_GPIO_Port,SW_Pin))==GPIO_PIN_RESET
  37.  
  38. const uint8_t Cdata[10]={0x3F,0x06,0x5B,0x4F,0x66,0x6D,0x7D,0x07,0x7F,0x6F};
  39.  
  40. int main(void)
  41. {
  42. uint8_t newCount=0,oldCount=100;
  43. uint8_t myData[2]={};
  44. myData[0]=Cdata[5];
  45. myData[1]=Cdata[1];
  46. /* Reset of all peripherals, Initializes the Flash interface and the Systick. */
  47. HAL_Init();
  48.  
  49. /* Configure the system clock */
  50. SystemClock_Config();
  51.  
  52. /* Initialize all configured peripherals */
  53. MX_GPIO_Init();
  54. MX_SPI1_Init();
  55.  
  56. /* Infinite loop */
  57. /* USER CODE BEGIN WHILE */
  58. while (1)
  59. {
  60. if(SW_Press){
  61. while(SW_Press);
  62. newCount++;
  63. }
  64. if(newCount>99) newCount=0;
  65. if(newCount!=oldCount){
  66. myData[0]=Cdata[newCount%10];
  67. myData[1]=Cdata[newCount/10];
  68. //HAL_SPI_Transmit(&hspi1,&myData,sizeof(myData),100);
  69. HAL_SPI_Transmit(&hspi1,&myData,1,100);
  70. oldCount=newCount;
  71. }
  72. }
  73. }
  74.  
  75. /**
  76.   * @brief System Clock Configuration
  77.   * @retval None
  78.   */
  79. void SystemClock_Config(void)
  80. {
  81. RCC_OscInitTypeDef RCC_OscInitStruct = {0};
  82. RCC_ClkInitTypeDef RCC_ClkInitStruct = {0};
  83.  
  84. /** Initializes the RCC Oscillators according to the specified parameters
  85.   * in the RCC_OscInitTypeDef structure.
  86.   */
  87. RCC_OscInitStruct.OscillatorType = RCC_OSCILLATORTYPE_HSI;
  88. RCC_OscInitStruct.HSIState = RCC_HSI_ON;
  89. RCC_OscInitStruct.HSICalibrationValue = RCC_HSICALIBRATION_DEFAULT;
  90. RCC_OscInitStruct.PLL.PLLState = RCC_PLL_NONE;
  91. if (HAL_RCC_OscConfig(&RCC_OscInitStruct) != HAL_OK)
  92. {
  93. Error_Handler();
  94. }
  95. /** Initializes the CPU, AHB and APB buses clocks
  96.   */
  97. RCC_ClkInitStruct.ClockType = RCC_CLOCKTYPE_HCLK|RCC_CLOCKTYPE_SYSCLK
  98. |RCC_CLOCKTYPE_PCLK1|RCC_CLOCKTYPE_PCLK2;
  99. RCC_ClkInitStruct.SYSCLKSource = RCC_SYSCLKSOURCE_HSI;
  100. RCC_ClkInitStruct.AHBCLKDivider = RCC_SYSCLK_DIV1;
  101. RCC_ClkInitStruct.APB1CLKDivider = RCC_HCLK_DIV1;
  102. RCC_ClkInitStruct.APB2CLKDivider = RCC_HCLK_DIV1;
  103.  
  104. if (HAL_RCC_ClockConfig(&RCC_ClkInitStruct, FLASH_LATENCY_0) != HAL_OK)
  105. {
  106. Error_Handler();
  107. }
  108. }
  109.  
  110. /**
  111.   * @brief SPI1 Initialization Function
  112.   * @param None
  113.   * @retval None
  114.   */
  115. static void MX_SPI1_Init(void)
  116. {
  117.  
  118. /* USER CODE BEGIN SPI1_Init 0 */
  119.  
  120. /* USER CODE END SPI1_Init 0 */
  121.  
  122. /* USER CODE BEGIN SPI1_Init 1 */
  123.  
  124. /* USER CODE END SPI1_Init 1 */
  125. /* SPI1 parameter configuration*/
  126. hspi1.Instance = SPI1;
  127. hspi1.Init.Mode = SPI_MODE_MASTER;
  128. hspi1.Init.Direction = SPI_DIRECTION_2LINES;
  129. hspi1.Init.DataSize = SPI_DATASIZE_16BIT;
  130. hspi1.Init.CLKPolarity = SPI_POLARITY_LOW;
  131. hspi1.Init.CLKPhase = SPI_PHASE_1EDGE;
  132. hspi1.Init.NSS = SPI_NSS_HARD_OUTPUT;
  133. hspi1.Init.BaudRatePrescaler = SPI_BAUDRATEPRESCALER_128;
  134. hspi1.Init.FirstBit = SPI_FIRSTBIT_MSB;
  135. hspi1.Init.TIMode = SPI_TIMODE_DISABLE;
  136. hspi1.Init.CRCCalculation = SPI_CRCCALCULATION_DISABLE;
  137. hspi1.Init.CRCPolynomial = 10;
  138. if (HAL_SPI_Init(&hspi1) != HAL_OK)
  139. {
  140. Error_Handler();
  141. }
  142. /* USER CODE BEGIN SPI1_Init 2 */
  143.  
  144. /* USER CODE END SPI1_Init 2 */
  145.  
  146. }
  147.  
  148. /**
  149.   * @brief GPIO Initialization Function
  150.   * @param None
  151.   * @retval None
  152.   */
  153. static void MX_GPIO_Init(void)
  154. {
  155. GPIO_InitTypeDef GPIO_InitStruct = {0};
  156.  
  157. /* GPIO Ports Clock Enable */
  158. __HAL_RCC_GPIOC_CLK_ENABLE();
  159. __HAL_RCC_GPIOA_CLK_ENABLE();
  160.  
  161. /*Configure GPIO pin : SW_Pin */
  162. GPIO_InitStruct.Pin = SW_Pin;
  163. GPIO_InitStruct.Mode = GPIO_MODE_INPUT;
  164. GPIO_InitStruct.Pull = GPIO_PULLUP;
  165. HAL_GPIO_Init(SW_GPIO_Port, &GPIO_InitStruct);
  166.  
  167. }
  168.  
  169. /* USER CODE BEGIN 4 */
  170.  
  171. /* USER CODE END 4 */
  172.  
  173. /**
  174.   * @brief This function is executed in case of error occurrence.
  175.   * @retval None
  176.   */
  177. void Error_Handler(void)
  178. {
  179. /* USER CODE BEGIN Error_Handler_Debug */
  180. /* User can add his own implementation to report the HAL error return state */
  181. __disable_irq();
  182. while (1)
  183. {
  184. }
  185. /* USER CODE END Error_Handler_Debug */
  186. }
  187.  
  188. #ifdef USE_FULL_ASSERT
  189. /**
  190.   * @brief Reports the name of the source file and the source line number
  191.   * where the assert_param error has occurred.
  192.   * @param file: pointer to the source file name
  193.   * @param line: assert_param error line source number
  194.   * @retval None
  195.   */
  196. void assert_failed(uint8_t *file, uint32_t line)
  197. {
  198. /* USER CODE BEGIN 6 */
  199. /* User can add his own implementation to report the file name and line number,
  200.   ex: printf("Wrong parameters value: file %s on line %d\r\n", file, line) */
  201. /* USER CODE END 6 */
  202. }
  203. #endif /* USE_FULL_ASSERT */
  204.  
  205. /************************ (C) COPYRIGHT STMicroelectronics *****END OF FILE****/
  206.  

Click here to download its source file.

STM32F103R6 Two-Digit 7-Segments Display Using SN74HC595N Shift Registers
SPI Send In 16-bit Mode


Popular Posts